Showing posts with label Debbie Sherman. Show all posts

Friday, February 27, 2015

Some Days.... Tropical Layout by Debbie Sherman


Some Days..... 
Designed by Debbie Sherman 

Hi Friends!  I'm sharing a layout with you today that I created with the KellyCraft™ Get-It-Straight™ Laser Square & Multi-Mat™ and Jimbo Lojik™ Stamps. If you live in a part of the country where the winters can get long, you start dreaming of places to stick your toes in the sand and relax.  Although our winter has been mild, it's still cold and windy and I can't wait for summer!

We'll start this layout by building the backgrounds with modeling paste, Stencil and Chalk Ink.
After your modeling paste has dried rub chalk ink over the raised areas with a make-up sponge.
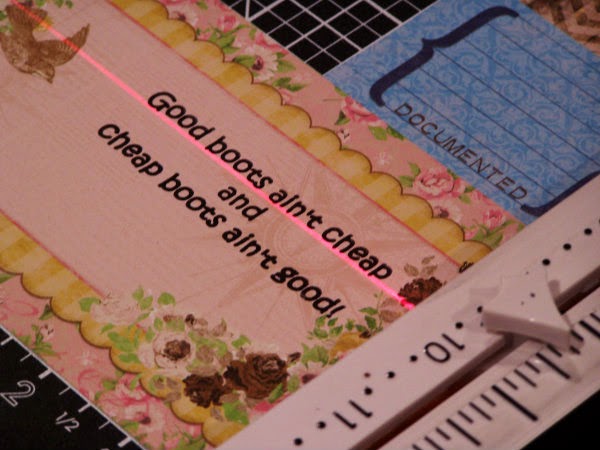
Now that you have your background built add your matting to the layout using the KellyCraft™ Get-It-Straight™ Laser Square & Multi-Mat™.

I use my photos to line everything up because I normally distress the edges of my matting.
 After I line the photo and matting I draw around it so that I know where they will be placed and I work on the background with Glimmer Mist.  Spray it randomly on the stenciled areas allowing it to drip down the page.
Adhere you mat and photo once again lining it up with the
Stamp your journaling onto a piece of paper lining it up with the 
I used a fun stamp by Jimbo Lojik Set B.
 Adhere your stamped journaling to your layout.

 Add your embellishments, I used some seed beads, flowers and some fish,  clam shells, star fish and some twine.  The fish are made with Makin's Clay®  and painted with DecoArt® Metallic Paint and then brushed with Perfect Pearls.

Hope you enjoyed this layout and are inspired to create your own beachy layout!
Thanks for stopping by the KellyCraft Blog today!
Debbie

Sunday, December 14, 2014

Believe! Layout by Debbie Sherman

Debbie Sherman created this gorgeous Christmas layout with the help of her Get-it-Straight™ Laser Square - find Debbie's full instructions on her blog here.

Friday, November 28, 2014

Good Boots Ain't Cheap Layout by Debbie Sherman

Good Boots Ain't Cheap Layout 
Designed by Debbie Sherman 

Hi Everyone! Debbie with you today to share a mixed media layout that I created using the Multi-Mat™, Get-It-Straight Laser Square™ and Jimbo Lojik™ stamps.The thing I love most about these products is how easy they make stamping on your layouts. I can't tell you how many times I've added stamping right on my layouts only to have to fix it with embellishments or cover it up because it's not straight. How many times have you made a layout only to look at it when it's finished and realize it was just a little off? 

The Multi-Mat and Get-It-Straight Laser Square is the perfect tool for making sure your layouts are perfectly straight! I matted this layout with several mats to share with you how easy this is to line everything ups and get it straight even when you distress the edges of your mats. The mat is magnetic and it comes with 4 magnets to hold your layout in place while you work on it. What made me happy is that I can still stick to my style even though it's distressed, mixed media and a little shabby!

Materials: 


                     - Jimbo Lojik™ Stamps - Set E
                     - Multi-Mat
Black Stazon Ink and cleaner
Chalk Inke for inking distressed edges - brown
Trimmer
Acrylic stamping block
Scissors
Adhesives
Patterned Paper of choice
Paper distressor
Embellishments of choice
Modeling paste
Stencil of choice
Flowers
Coordinating sprays or mists
Gesso
Photo

1. I started this project by cutting 2 mats from patterned paper, snipping the bottoms to create a banner shape.  Distress the edges and ink with chalk ink of choice I used brown. Next I outlined the area where my mats were going to be adhered and then added modeling paste using a stencil, around the outlined area,  After the pasted dried  I misted it with different coordinating mists.

2. Lineup your first mat on your background sheet using the Multi-Mat and Get-It-Straight Laser Square.  Adhere to background paper.
2. Adhere your second mat to the center of the first using the same process as previously described. Continue layering the mats and photo.
3. Using the Get-It-Straight Laser Square and Jimbo Lojik Stamps, stamp your journaling onto a journaling card or paper of choice.

Lift the stamp and admire how straight the stamping is! 

 4. I added a piece of lace.

5. I positioned the stamped journaling on my layout and adhered it.  I layered some scraps around the journal tag.
6. I finished up with embellishments and some random background stamping and gessoed the flowers


Thanks for stopping by the KellyCraft blog today!!! - Debbie