Showing posts with label KellyCraft Get-It-Straight- Laser Square. Show all posts

Friday, February 27, 2015

Some Days.... Tropical Layout by Debbie Sherman


Some Days..... 
Designed by Debbie Sherman 

Hi Friends!  I'm sharing a layout with you today that I created with the KellyCraft™ Get-It-Straight™ Laser Square & Multi-Mat™ and Jimbo Lojik™ Stamps. If you live in a part of the country where the winters can get long, you start dreaming of places to stick your toes in the sand and relax.  Although our winter has been mild, it's still cold and windy and I can't wait for summer!

We'll start this layout by building the backgrounds with modeling paste, Stencil and Chalk Ink.
After your modeling paste has dried rub chalk ink over the raised areas with a make-up sponge.
Now that you have your background built add your matting to the layout using the KellyCraft™ Get-It-Straight™ Laser Square & Multi-Mat™.

I use my photos to line everything up because I normally distress the edges of my matting.
 After I line the photo and matting I draw around it so that I know where they will be placed and I work on the background with Glimmer Mist.  Spray it randomly on the stenciled areas allowing it to drip down the page.
Adhere you mat and photo once again lining it up with the
Stamp your journaling onto a piece of paper lining it up with the 
I used a fun stamp by Jimbo Lojik Set B.
 Adhere your stamped journaling to your layout.

 Add your embellishments, I used some seed beads, flowers and some fish,  clam shells, star fish and some twine.  The fish are made with Makin's Clay®  and painted with DecoArt® Metallic Paint and then brushed with Perfect Pearls.

Hope you enjoyed this layout and are inspired to create your own beachy layout!
Thanks for stopping by the KellyCraft Blog today!
Debbie

Thursday, February 19, 2015

Hangin’ with the KellyCraft Dudes Layout by Candice Windham

Hangin’ with the KellyCraft Dudes
Designed by Candice Windham

Every January, I attend the Craft and Hobby (CHA) convention in Anaheim, California. This is where all the new items in the world of craft creativity are unveiled, where new uses for the older ones are shown and where I get to hang out with people who think like me.

Some of the people who think like me are the folks from KellyCraft™, Aaron and Jimbo. They premiered the KellyCraft™ Get-it-Straight™ Laser Square the first time I met them at CHA several years ago, and they have been coming up with something new every year since. (If you don’t have a KellyCraft™ Get-it-Straight™ Laser Square and the Multi-Mat™ Docking Station, you need one! See the special offer here.) This year was no different with their exclusive line of Duck Commander® stamps. These great stamps come in both red rubber and clear polymer and feature the Robertsons, the first family of duck calls.

This year’s CHA KellyCraft™ booth featured a photo station, so how could I not have my pic made with Willie and Si Robertson? The only problem is that I wasn’t wearing camo, so I stuck out like a sore thumb… kind of like Si’s tea glass. At least we were both the same color.

Here’s how I created this scrapbook page:

Supplies:

KellyCraft - Get-it-Straight™ Laser Square
                  - Multi-Mat™
                  - Duck Commander® Clear Polymer Stamps, Set 1
Clear acrylic block
Card Stock, one 12” x 12” sheet, two 12” x 4” pieces and two 8 ½” x 11” pieces
Spellbinders® - Grand Nestabilities Dies, Set LF-190
                        - Grande Calibur
Viva Decor Pearl Pens, bronze and gold 
Ranger Distress Ink Pads, Scattered Straw, Pine Needles, Vintage Photo and Broken China 
Tags, three small, one medium and one large
French General Cording, Brown 
Kool Tak - Foam Squares
                - Premium Extreme Adhesive 
                - Artist’s Tape 
Marvy Brown marker
Printed photo
Hole punch, ¼”
Scissors

Instructions:

Note: All pieces are sponged with Vintage Photo ink along the edges.
Note 2: In step 1, the page is set slightly outside the Multi-Mat™ Guide top allow for the Acrylic block, so the center is actually at 6 1/4”

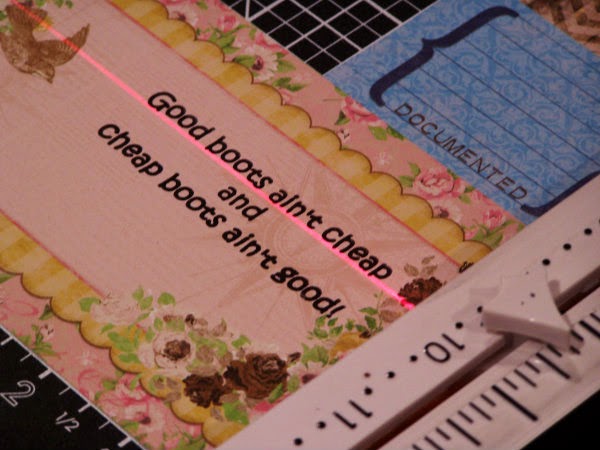
1. Line up your background paper one the Get-it-Straight™ Laser Square and Docking
Station. Beginning in the center of the page, set the Get-it-Straight™ Laser Square arrow at 6” and stamp the Duck Commander® image with Pine Needles ink. Stamp two more stamps approximately 1” apart in that row. Stamp the last stamps on the row, allowing the image to run off the edge. Repeat this process, setting your guide at 3” and 9” and offsetting the rows above and below the first row. Repeat until the page is full.

2. Repeat this process in the empty spaces with the Happy, Happy, Happy stamp and Scattered Straw ink. Set aside.

3. Die-cut the photo using the second-largest image in the Spellbinders Grand Nestabilities set and die-cut the card stock backing with the largest die. Adhere these pieces together using Kool Tak Premium Extreme Adhesive. Punch holes either side of the photo and run brown cording through each hole.

4. Apply Kool Tak  Foam Squares to the back of the photo mat and adhere it to the stamped page, using the Get-it-Straight™ Laser  Square. Wrap the cord to the back of the page and adhere it in place with Kool Tak Artist’s Tape.

5. Holding the two pieces of 12” x 4” card stock together cut one edge to mimic grass. Flip one piece over so the grass pieces don’t line up perfectly and ink both pieces with several ink colors.
Tip: When you don’t have the color of card stock you need, find a similar or lighter shade and ink it to match with one or more of the inks you are using on the page. It may not be perfect, but it will look just fine.

6. Adhere the first piece of card stock to the bottom of the page. Adhere the second, placing it about ½” below the first, and then trim off the excess on the bottom of the page.
7. Trim three tags to fit the area above the photo. Sponge the tags
with Vintage Photo, Scattered Straw, Pine
Needles and Broken China. Using the brown marker, ink one word
at a time on the Happy, Happy, Happy stamp and stamp it on the tag. Repeat with the other two tags. Tie each with a knot on the brown cord and use the KellyCraft Get-it-Straight Laser Square to line up the tags, keeping the center tag straight and angling the other two. Wrap the excess cord to the back at each corner and secure with Kool Tak Artist’s Tape.

8. Ink the largest tag with all the inks. Sponge the edges of the medium tag with Vintage Photo and tie the two together. Write your sentiment on the medium tag, and then tie them to the cord at the top of the page. Place a little adhesive on the back of each tag to hold it in place. 

9. For the finishing touches, apply dots of the Pearl Pens over the entire page and then scribble along the bottom to mimic weeds.

With my KellyCraft™ products, I am assured of good stamped images and nice, straight lines with no effort on my part. I’m also assured of a great memory from CHA 2015!


Friday, November 28, 2014

Good Boots Ain't Cheap Layout by Debbie Sherman

Good Boots Ain't Cheap Layout 
Designed by Debbie Sherman 

Hi Everyone! Debbie with you today to share a mixed media layout that I created using the Multi-Mat™, Get-It-Straight Laser Square™ and Jimbo Lojik™ stamps.The thing I love most about these products is how easy they make stamping on your layouts. I can't tell you how many times I've added stamping right on my layouts only to have to fix it with embellishments or cover it up because it's not straight. How many times have you made a layout only to look at it when it's finished and realize it was just a little off? 

The Multi-Mat and Get-It-Straight Laser Square is the perfect tool for making sure your layouts are perfectly straight! I matted this layout with several mats to share with you how easy this is to line everything ups and get it straight even when you distress the edges of your mats. The mat is magnetic and it comes with 4 magnets to hold your layout in place while you work on it. What made me happy is that I can still stick to my style even though it's distressed, mixed media and a little shabby!

Materials: 


                     - Jimbo Lojik™ Stamps - Set E
                     - Multi-Mat
Black Stazon Ink and cleaner
Chalk Inke for inking distressed edges - brown
Trimmer
Acrylic stamping block
Scissors
Adhesives
Patterned Paper of choice
Paper distressor
Embellishments of choice
Modeling paste
Stencil of choice
Flowers
Coordinating sprays or mists
Gesso
Photo

1. I started this project by cutting 2 mats from patterned paper, snipping the bottoms to create a banner shape.  Distress the edges and ink with chalk ink of choice I used brown. Next I outlined the area where my mats were going to be adhered and then added modeling paste using a stencil, around the outlined area,  After the pasted dried  I misted it with different coordinating mists.

2. Lineup your first mat on your background sheet using the Multi-Mat and Get-It-Straight Laser Square.  Adhere to background paper.
2. Adhere your second mat to the center of the first using the same process as previously described. Continue layering the mats and photo.
3. Using the Get-It-Straight Laser Square and Jimbo Lojik Stamps, stamp your journaling onto a journaling card or paper of choice.

Lift the stamp and admire how straight the stamping is! 

 4. I added a piece of lace.

5. I positioned the stamped journaling on my layout and adhered it.  I layered some scraps around the journal tag.
6. I finished up with embellishments and some random background stamping and gessoed the flowers


Thanks for stopping by the KellyCraft blog today!!! - Debbie 


Thursday, November 20, 2014

Pretty as a Picture Scrapbook Layout by Candice Windham

Pretty as a Picture
Designed by Candice Windham 

Pretty as a Picture - 

My friend Andrea Nash is one of the most beautiful women I’ve ever known. With her Elizabeth Taylor/Suzanne Pleshette good looks, she attracts people instantly, but this beauty is not just skin-deep. Andi has a big heart, quick smile and a laugh (that sometimes turns into a snort) that just energizes any room she is in.

To top all this off,  her voice is a powerful alto that brings solo power and harmony richness to the vocals of Sorghum Hill, the band that my husband has been a part of for too many years to count. I’m so lucky that they practice at my house, because I get to hear those sweet harmonies live more than anyone else in the world.

I snapped this photo of Andi at the Hemman Winery in Brazeau, Missouri. It’s always been one of my favorites. I hope she enjoys this tribute as much as I enjoy her friendship.

Using the KellyCraft™ products made this project come together quick and easy and I don’t have to second-guess my alignments! All the papers came from my scrap box, which means I don't know the manufacturers and many may be discontinued, for which I apologize.

Here’s how I made it:

Materials: 

KellyCraft™ - Get-it-Straight™ Laser Square
                      - Multi-Mat™
Cardstock: 12” x 12” Dark Orange and Striped Patterned Paper, 8 ½” x 11” Cream, Dark Orange
Paper: Green Patterned Floral Paper, 12" x 12"
Paper scrap patterned paper assortment in Autumn colors- tan, brown, gold, green and orange 
Sizzix - Big Shot® 
           - Dies: Tattered Florals, Tattered Leaves (Tim Holtz Alterations) and Flourish/Floral With 
            Leaves
QuicKutz Die Cut Alphabet 
Photo
Glue Dots, medium and large
Beacon ZipDry Liquid Adhesive 
Double-stick Adhesive, 2" or doubled up 1" 
Circle punches, assorted sizes, 1/2" to 1"
Computer and Printer

Viva Décor Copper Pearl Pen

Directions:

Notes: 

1. I did not use the powerful magnets that came with the Multi-Mat™ because I lost them during this photo shoot. I would have used them to hold my layout in place as soon as I put the background papers together to avoid having to make sure my papers were still in place every time I used the Get-it-Straight™ Laser Square.    It's okay Candice - we are all only human!  Hope those magnets show up soon lol! 

2. I always use a lot of sponging in my work. I think the only pieces that weren't sponged were the background papers and the layers of the photo; that's because I forgot. 

On a full sheet of dark orange 12” x 12” card stock, layer a piece of striped patterned card stock trimmed to 11" x 11".


Cut a piece of card stock 1/8"  larger all around than the photo. Add an additional layer of patterned paper 1/8" larger all around than the photo, attaching only at the top and bottom with 2" double stick adhesive to create a pocket for the journaling tags. Attach the photo with double stick adhesive, centered and about 1 1/2" above the bottom edge. 


Print small title block on cream card stock with computer and
printer (Font: Mistral). Trim out and layer onto green card stock  
cut 1/8” larger all around than the small title block. Center and use the Get-it-Straight™ Laser Square to line it up just over the bottom of the photo.


Cut three sets of flowers from scrap papers and card stock with Big Shot. Sponge all the flower edges with Walnut Ink and curl the edges. Layer smaller flowers onto larger flowers with medium Glue Dots.  Punch copper card stock with circle punches for flower centers (the copper flower centers were created with a piece of copper paper texturized with a texture plate that was in my scrap box) and attach with Zip Dry adhesive.  


Attach the center flower to the layout first using a large Glue Dot, place the right flower second and a little lower than the center one, then use the  Get-it-Straight™ Laser Square to align the flowers on the left.

Cut printed postcards from paper stash paper or use cream card stock. Sponge the edges with Walnut Stain Distress Ink. Punch flowers with Sizzix Tattered Florals Die and attach them to the tag sides. Slip a tag in each side of the pocket created with the 2"double-stick tape.

Cut headline with QuicKutz dies and use ZipDry Adhesive to attach it just above the small title block.


Cut four swirls from dark orange and green patterned paper and attach to both sides with Zip
Dry adhesive, using the KellyCraft Get-it-Straight Laser Square to get the swirls the same height from the bottom of the page on both sides. Add a couple of flowers from the Tattered Florals die.

Add dots randomly with Viva Décor Copper Pearl Pen to give this layout a little more pizzazz and that's it. Quick and easy, but it will be appreciated for a long time!

I think this would look great in a shadow box frame. It will also make a nice Christmas gift for Miss Andi!  (Spoiler alert!)

Tuesday, November 18, 2014

Fear the Beard! Card by LaJeania Hicks


"Fear the Beard" Card 
Designed by LaJeania Hicks

The new Duck Commander® stamps from KellyCraft™, are perfect for creating masculine cards. It seems I am always searching for stamps to make cards for the men in my life. These stamps are perfect for our family that loves Duck Dynasty® and the Robinson family. I created this Fear The Beard card for a friend who has been growing out his beard for a while now and it is perfect for No Shave November. Of course I used the the KellyCraft Get-It-Straight™ Laser Square and mat to line up all of the layers perfectly.

Materials:

KellyCraft - Get-It-Straight™ Laser Square
                  - Multi-Mat™
                  - Duck Commander® Clear Stamp Set 1
CTMH - Timberline Paper Pack – Close To My Heart
             - Chocolate Ink Pad
             - Solid cardstock, 1 sheet Chocolate, 1 sheet Bamboo
             - Durables Triangle Studs
Adhesive (Glue Dots, Pop Dots, Scotch ATG)


Instructions:

1. Cut a piece of Chocolate card stock at 5”x7” and one piece at 3.5”x4”. Cut the wood grain patterned paper at 6.75" x 4.75".  Cut
the hounds tooth patterned paper at 3.25”x3.75” and the bamboo cardstock at 3”x3.5”.  Next, sponge ink the edges of all pieces of paper with the Chocolate ink.

2. Use your Get-It-Straight™ Laser Square to stamp the images on the Bamboo Cardstock using Chocolate ink.


3. Use your Get-It-Straight™ Laser Square to align the mats to create layers.


4. Use your Get-It-Straight™ Laser Square to attach the center image using pop dots.


5. Using the Get-It-Straight™ Laser Square makes it easy to line up the Triangle Studs perfectly.

This card was so simple and easy to put together using the Duck Commander® Stamp Set and the  Get-It-Straight™ Laser Square.

Friday, November 14, 2014

"Classy, Sassy" Wedding Layout by Kristina Beagle


“Classy, Sassy” Wedding Layout 
Designed By Kristina Beagle 

I wanted a layout to showcase me and my best friend at her wedding. The photo booth was a huge hit. Silly photos, serious photos… I could fill a whole scrapbook! I wanted something elegant, yet a little racy, to show off our personalities in the photos.

Materials: 

KellyCraft™ - Jimbo Lojik™ stamps - Set B 
            - Get-it-Straight™ Laser Square
            - Multi-Mat™
DCWV® papers - Black Currant Stack
Spellbinders®Labels 10 die 
Tsukineko® VersaMark® embossing pad 
Hampton Art A La Mode Embossing Powder - Black
Silhouette® Cameo®
Paper trimmer, scissors, adhesive, foam dots, black ribbon, rhinestones, flower die cuts 


Instructions:

1) I always start by sketching out my layout, measuring and cutting all my main page elements, then matting everything where needed.


2) Starting from the bottom up, I assembled the page elements on top of each other, using the Get-it-Straight™ Laser Square to align each piece.  I started with a lighter, ivory 12" x 12" card stock and a 4” bolder pattern at the bottom, topped with a thin strip of another bold pattern, matted on black card stock to transition the two patterns, and topped with a strip of ribbon. 


3) Next, on to the photos. Using the Get-it-Straight™ Laser Square, align the main page photo, also matted on black card stock, and adhere to the page. The secondary photos were made into a photo strip, I cut out a simple rectangle to size on the Silhouette, and adhered with pop dots.


4) I stamped my page title on to a Spellbinder's die cut with a KellyCraft™ Jimbo Lojik™ verse using VersaMark ink, heat embossed with black powder, aligned it with the Get-it-Straight™ Laser Square, and adhered it to the page. 

5) To finish off the page I embellished with assorted rhinestones & die cuts.