Give The Queen A Call!
One of the techniques that I love to use when I'm designing cards is layering. I just love to layer multiple papers and embellishments on my cards and scrapbook pages. Even though I love this look, I always found it hard to accomplish. I am one of those people who can't draw a straight line with a ruler!
When I found the KellyCraft Get-it-Striaght Laser Square at last summer's CHA show, I thought I had died and gone to heaven! Finally! I found a tool that takes all the guess work out for me and I can layer my projects once again without the stress of making sure everything was straight!
True Beauty Card
Supplies
Cardstock- Ivory, Lt. Aqua, Dk. Aqua, Rose, Green
Foam Squares
Rhinestone Embellishments
Flowers
Instructions
Make a color copy of the rose image onto a piece
of ivory cardstock. You'll need two copies for layering.
Cut your cardstock as follows: Base card is 8"H x 6"W.
Pattern paper 7 3/4"H x 5 3/4"W, Rose cardstock
5"H x 3 1/2"W, Dark Aqua cardstock 2 1/4"H x 5 3/4"W,
Green cardstock 3"H x 2/14"W, Ivory 2 3/4"H x 2"W.
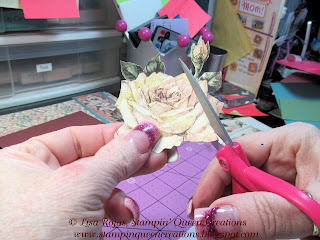
Cut out large rose in sections. Curl edges of each
piece with the end of a paintbrush.
Stamp small frame onto ivory cardstock. On a piece
of scrap ivory cardstock, stamp wording with Sparrow
inkpad.
Cut out center of frame. Attach wording to the back
of the frame with glue.
of your layers and adhere them with glue.
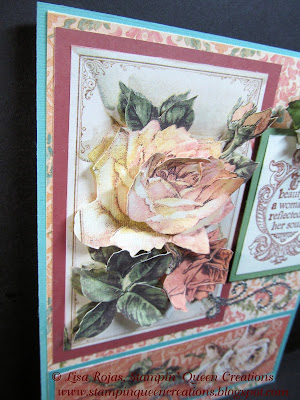
layers to large rose image with foam squares. Next,
adhere rhinestone embellishements, wording and
flowers. Use picture if needed for placement.
This picture shows the layers of the flower.


No comments:
Post a Comment