The fun verse on this card is from one of our Jimbo Lojik™ stamp sets - you can find it and many more that are sure to make you smile here
Our mission is to bring you high quality innovative products to enhance your craft experience while providing excellent customer service! The Get-It-Straight™ Laser Square utilizes a patent-pending sliding laser design, allowing you to quickly and easily align multiple objects - perfect for scrapbooking, stamping, quilting, school projects & more. Our Multi-Mat™ works perfectly with the Laser Square. We also have unique stamping options with our Jimbo Logik™ & Duck Commander® stamps!
Wednesday, April 29, 2015
Put Your Big Girl Panties On! Have you seen our Pinterest Page?
Did you know KellyCraft™ has Pinterest boards full of fun and creative projects to inspire you? Find this fun card and many more ideas! https://www.pinterest.com/ kellycraftinnov/
The fun verse on this card is from one of our Jimbo Lojik™ stamp sets - you can find it and many more that are sure to make you smile here
Tuesday, April 28, 2015
"Double Duckmen!" Card by Monica Edwards
Hi everyone! Monica here today sharing my
Duckmen official card I made along with my KellyCraft™ - Get-It-Straight™ Laser Square and Multi-Mat™ This tool is a must have for everyone. No more crooked stamps, no more guessing if you have lined it up right. I don't know about everyone else, but I am sure glad I don't have to turn my card five different directions, upside, right side up etc... just to figure out if I have it straight. Now stamping along with my Get-it-Straight Laser Square™ that is a thing of the past and thank goodness!!
Supplies:
KellyCraft™ - Get-It-Straight™ Laser Square
- Multi-Mat™
- Duck Commander® Duckmen stamp
- Duck Commander® Clear Polymer Set 1
Close to my Heart card stock - natural, black
Hero Arts fern stamp
Ranger Tim Holtz™ Distress Ink - Tea Dye and Walnut Stain
Paper trimmer
Adhesive of choice
First, I cut a piece of cardstock 4x6 and then used my stamp to create a sort of mirrored image because I stamped it twice on the cut cardstock. Once in Tim Holtz Distress ink tea dye and then walnut stain.
Then I stamped the "Duckmen" sentiment 2 times on a strip of paper measured at .75x6.5 that I then layered onto a piece of black cardstock measured at 1x7.
After, I used my Get-it-Straight Laser Square™ to align the sentinment along the topside of the card as shown above.
Here is my finished card perfectly aligned. I hope everyone enjoyed my post and be sure to stop by the blog to check out the other amazing creations from our Creative Team.
Monday, April 27, 2015
How do I love thee? By Candice Windham
We think this adorable How do I LOVE thee mini album designed by Creative Team Member Candice Windham is wonderful! Candice used our 2" EZ-De's Flourish Alphabet to create this project. You can find her instructions here. This set is on sale right now for 75% off - just $8.99 for the entire alphabet! Find it here.
Let's Rock! Layout by Kristina Beagle
Let's ROCK! What a fun layout by Creative Team Member Kristina Beagle! She used her Get-it-Straight™ Laser Square to align her elements. Find her instructions on her blog here.
Sunday, April 26, 2015
Bright & Cheerful Birthday Card by Kristina Beagle
Creative Team Member Kristina Beagle shared this bright & cheerful Birthday card on her blog recently! She used her Get-it-Straight™ Laser Square and Multi-Mat™ to align her elements - find her full instructions here.
Friday, April 24, 2015
Memories of Memphis Altered Vintage Window by Candice Windham
Memories of Memphis
Designed by Candice Windham
My hometown is Memphis, Tennessee, home also of Elvis, the blues, barbecue, Beale Street, the mighty Mississippi rolling on it’s way to the Gulf and the scent of Wisteria this time of year.
I also love our history. That’s why I was so excited when I found this window from a Memphis trolley from the early 1900s at a local
antique shop. My grandmother, grandfather and great-grandmother, all included in the final collage, could have looked out this very window. Note: The dark area on the upper left corner of the window is actually an old screen print detailing the fares and rules for riding the trolleys. Someone tried to remove it, so it’s hard to read, but I wouldn’t take it off for anything. It’s history.
My KellyCraft™ Get-It-Straight™Laser Square made lining up many of the elements so much easier than guessing or trying to wield my giant 3’ t-square. I used Kool Tak™ Premium Extreme to adhere all of the photo layers and attachment to the backing and then used Kool Tak™ Foam Squares to add some extra-special memorabilia to the outside of the window: a tag from our famous Memphis Water and a key from the Hotel King Cotton, now just a memory.
Here’s how I brought this piece back to life.
Materials:
KellyCraft™ Get-it-Straight™ Laser Square and Multi-Mat™ Docking Station
Kool Tak™ Premium Extreme Adhesive, ¼”, Foam Squares 1/8" x 1/8"
Foam board cut to fit the window
Printed card stock (Haberdashery slab, The Paper Studio)
Photos
Solid card stock scraps, cream and tan
Letter stickers (Real Life: Pebblesine)
Hinge and key stickers (Nostalgiques, Dee’s Designs )
Small white tag
Black permanent marker
Self-adhesive lace (French General)
Red and Brown Inks (Tim Holtz Distress Ink, Ranger)
Glazer’s points or staples
Tools: sponges, scissors
Trim photos and sponge edges with red and brown ink.
Trim printed card stock to ½” larger all around than the photos. Mount each photo on a different card stock print, lining up each photo with the Get-it-Straight™ Laser Square and Multi-Mat™ Docking Station and using Kool Tak™ Premium Extreme Adhesive to attach the photos to the printed card stock. Arrange the photos on the foam board.
TIP: One of the photos I wanted to use was too large for my printer, so I printed it twice, one placed as far to the right as possible on the layout page, cutting off the left side, and one placed as far to the left as possible on the layout page, cutting off the right side. I then found an easy place to join the photos and sliced off the excess. I joined them by placing a strip of Kool Tak™ Premium Extreme Adhesive close to the edge of the smaller piece and lining the pieces up. You can also use the tiling setting on your printer to print over-sized photos if your printer has that feature.
Cut plain card stock to fit the area where the screen printing is located. Stamp swirls using brown ink randomly on the card stock.
Attach all the photos and the two pieces of stamped card stock (in the upper left screen print area on the window) to the foam board. Use the sides, top and bottom of the foam board to align the photos straight.
Tip: Since the collage items will be under glass, you don’t need as much adhesive as you would normally use to hold items in place. One strip at the top will do the job.
Tear a strip of printed card stock 12” wide and about 2” tall. Add the words with the alphabet stickers.
Remove the Get-it-Straight™ Laser Square from the Multi-Mat™ Docking Station. Place the Laser Square not he upper right edge of the foam board and line up the laser beam where you want the top of the title block to be. Adhere the title block.
Raise the laser line about ½ above the title block and place the self-adhesive lace along that line.
I wanted to use a reference to Johnny Rivers’ recording of Memphis which was also a promotional phrase used in Memphis tourism brochures, so I hand-wrote the words “Give me” with the permanent marker on a tag sponged with brown ink and attached it to the left of the Memphis, Tennessee strip, wrapping the string through the lace.
Add sticker embellishments (hinge, key and ink pen) as desired.
Place the entire board behind the window and secure it in place with glazer’s points, staples or small framing nails.
In the area on the front where I preserved the screened print, I felt it needed something to break up
the big black square, so I added this vintage key from the King Cotton Hotel, attaching it with Kool Tak™ Foam Squares. The key was too thick to be placed under the glass but it needed something to anchor it, so I added a tag from a promotional bottle of Memphis Water, securing it also with foam squares.
I placed a note on the back describing the significance of this odd frame. This piece will occupy a place of honor in my home because it contains photos of some of the things that makes Memphis so special: Elvis, Beale Street, the original Cossitt Library building, a vintage photo of the Memphis cobblestone wharf with cotton bales and workers, the Tennessee Brewery building and employees, my sweet grandparents and my great-grandmother with my sister and me. I hope this will be handed down in my family for generations to come.
Keep an eye out for unique base pieces such as this window, whether from old vehicles, old houses or old commercial buildings. They can make unique home décor items, plus, they deserve to be rescued.
I also have a window from a 135+ year-old Arlington, Tennessee home that I’ve been hoarding for several years now and have finally decided how to use it. Watch for a future project featuring this wonderful item.
Now get out and hit the antique, second-hand and architectural salvage stores in your area. Give an old item a new home!
Thursday, April 23, 2015
Your Own Kind of Wonderful Card by LaJeania Hicks
Creative Team member LaJeania Hicks shared this card made with the Get-it-Straight™ Laser Square on her blog recently and we wanted to share it with you! I love the colors on this card. Her instructions can be found here.
Tuesday, April 21, 2015
3 Speeds Card by Martha Lucia Gomez
3 Speeds Card
Designed By Martha Lucia Gomez
Hi everyone, Martha Lucia here with a "Football Card" to share with you. Today I am featuring one image of the Jimbo Lojik Collection J Stamp Set, one of my favorites sets of the entire collection. And of course my Get-It-Straight™ Laser Square and Multi-Mat™, the best tools that I have in my Atelier to create my cards and art crafts.
MATERIALS:
- KellyCraft™ Get-it-Straight™ Laser Square
- KellyCraft™ Multi-Mat™
- Jimbo Lojik™ Stamp Set J
- ESF Chalk It Up Cherry Jubilee
- Football Player Laser Cut from Unique Laser Designs
- Card stock Whisper White, Night of Navy and Real Red (Stampin Up)
- Big Shot (Sizzix)
- Circle Interlock Darice Embossing Folder
- Circle Framelits Collections
- Distress Tool
- Nigth of Navy Classic Ink
- Snail Adhesive
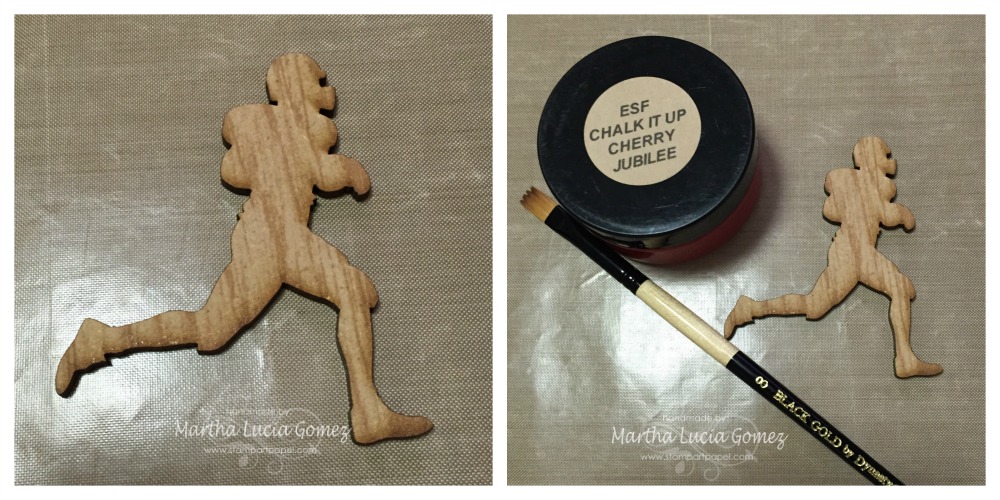
1. To create this project I am using a Football Player Laser Cut from Unique Laser Designs. It's comes in natural wood and I decided to give color using ESF Chalk It Up Cherry Jubilee.
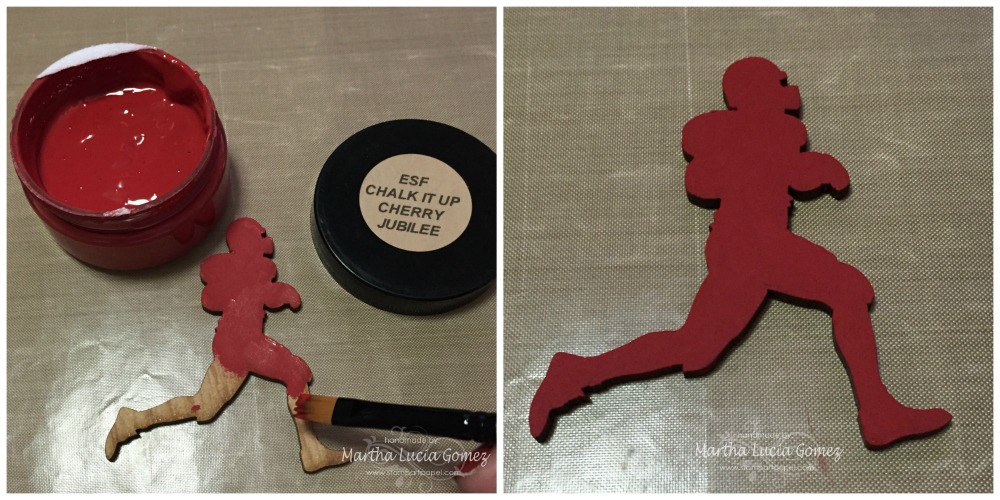
2. I applied the ESF Chalk It Up with a Black Gold by Dynasty paint brush and let it dry for a few minutes.
3. After this, I cut the base of my card using Real Red card stock. The size of the card is a regular size 5-1/2"x4-1/4". I also cut the second and third layers. The second layer is night of navy and the size is 5-3/8"x4-1/8". The third layer is 5-1/8"x3-7/8".
4. I decided to stamp the sentiment first, using my Get-it-Straight™ Laser Square. This helps me to align all my stamps. The Jimbo Lojik™ stamps are clear acrylic, but I also use this great tool for wood stamps.
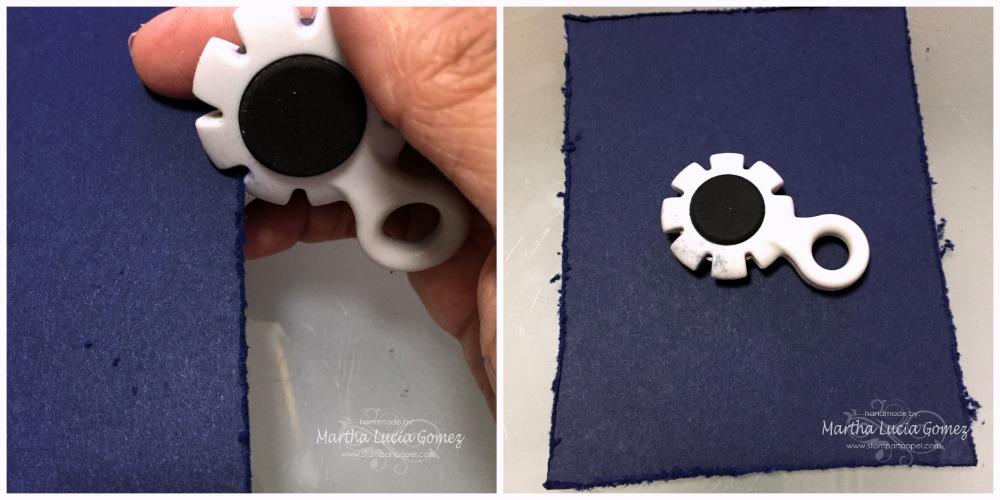
5. Using a distress tool, I created a distress border over the second layer. 6. Then, I aligned the three layers and pasted these using snail adhesive.
6. When the base of the card was finished, I pasted the special details. I embossed a piece of card stock with a Circle Interlock Embossing Folder and pasted this over the white layer. I cut a circle with a framelit and pasted it with snail adhesive too. I finally pasted my principal embellishment: the painted football player.
I always use my Get-it-Straight™ Laser Square to align the layers, the embellishments and all the pieces that I use in my creation: believe me, this tool is a real investment. I hope my project inspired you, and come back soon for more ideas! - Martha Lucia
Monday, April 20, 2015
Love This Life Layout by LaJeania Hicks
Love This Life
Created by: LaJeania Hicks
Even though our life may be crazy, busy, and hectic, I would not change one think about it. I truly Love This Life. I created this layout for our monthly crop and featured the use of the KellyCraft Get-It-Straight™ Laser Square and Multi-Mat™, to make sure everything was lined up perfectly.
Materials:
KellyCraft™- Get-It-Straight™ Laser Square
KellyCraft™ - Multi-Mat™
Heartstrings Paper Pack - Close To My Heart
Stuck on You Puffies & Cranberry Twine - Close To My Heart
Whisper Ink Pad - Close To My Heart
Cranberry, Whisper, Lagoon, and White Daisy Cardstock - Close To My Heart
Hearts Embossing Folder - Close To My Heart
Art Philosophy and Storybook Cricut Cartridges - Close To My Heart
Cuttle Bug
Adhesive (Glue Dots, Pop Dots, Scotch ATG)
Instructions:
Instructions:
1. Cut the paper as listed:
16 patterned paper square (various designs) – 1 ½”x1 ½”
White Daisy Cardstock – 9 ¾”x9 ¾”
Lagoon Patterned Paper – 5”x5” (2)
Cranberry Patterned Paper – 6”x6” (2)
Whisper Cardstock – 12”x12” (2)
Lagoon Cardstock – 5 ½”x5 ½”; 5”x5” (2)
2. Next, sponge ink the edges of all pieces of paper with the Whisper ink.
3. Use your Get-It-Straight Laser Square and mat to align the paper in the embossing folder so that your design is embossed
straight and then emboss each piece using the Cuttle Bug or other embossing machine.
4. Using the Get-It-Straight Laser Square, align the squares around the White Daisy mat so they are evenly placed.
- White Daisy mat to Whisper Cardstock.
- Cranberry patterned paper, Lagoon cardstock and patterned paper.
- Align the Love This part of the title across the top.
- Align the Life part of the title across the bottom and attach with pop dots.
6. Attach Cranberry twine to photo mats and the Stuck on You Puffies around the layout.
Thursday, April 16, 2015
2015-2016 Creative Team Call!
Calling all Designers! Are you a paper crafter, quilter, or mixed-media artist? KellyCraft Innovations is looking for a few GREAT Designers! KellyCraft is committed to assisting the crafting community in promoting crafts of all types with the use of KellyCraft’s innovative tools and products.
The KellyCraft Creative Team term begins June 1, 2015 and ends on June 1, 2016.
Creative Team Perks:
• Receive shipments of KellyCraft Innovations products for inclusion in their projects as reimbursement for serving on Creative Team.
• Receive additional supplies or materials from other companies for blog hops.
• Additional engagement and support/promotion from KellyCraft’s social media profiles.
• KellyCraft exclusive opportunities.
As a KellyCraft Creative Team member, you will be expected to:
• Create one unique project monthly with written clear and concise instructions and hi-resolution step-out photos and photo of completed project (a template will be provided) featuring KellyCraft Innovations products to be submitted for publication on the KellyCraft blog.
• Publicize project and support KellyCraft products on personal blogs, Facebook, and other social networking platforms you participate in.
• Share one additional project monthly on your own personal blog featuring KellyCraft products. KellyCraft will share the link to their projects on KellyCraft blog and social networking sites.
• Participate in blog hops coordinated by KellyCraft (this will be Creative Team member’s project post with tutorial and step-out photos for that month).
• Members may be asked to submit projects for display at trade shows and events. Postage to and from KellyCraft will be provided by KelllyCraft, and projects will be returned to designers unless a separate purchase contract is made for projects.
• Creative Team Members may be asked to create one or more project videos per Creative Team term. If videos are requested, a format will be provided and all videos would be pre-approved by KellyCraft prior to publication. If videos are requested and approved for publication, Creative Team Members would be paid for the production of each video.
• Assist with trade representation as needed. Transportation costs will not be provided, however, members will be paid hourly for trade show representation.
To be considered for a position on the KellyCraft Creative Team, please send one entry with the following information to Cindi Bisson at cdjb11@yahoo.com.
• Include 3-5 projects with direct links to them on your blog or 3-5 images of your completed work
• Tell us about yourself in 200 words or less
• Tell us what type of crafts like to create the most
• Tell us what other Design Teams you are current a member of and what Design Teams (if any) you have been a member of in the past.
• Social Media Stats and URLS:
• Blog URL (along with any additional websites you may own)
▪ Number of followers/subscribers on your blog
• Twitter handle (if applicable)
▪ Number of Twitter followers
• Pinterest URL
▪ Number of Pinterest Followers
• Facebook page URL (if applicable
▪ Number of “Likes” for your blog’s Facebook page
• Any additional social media URLs and following including G+, Tumbler, Instragram, YouTube, etc.
Email your entry to cdjb11@yahoo.com on or before Friday, May 1st to be considered. This is open to U.S. and Canada residents only.
Sunday, April 12, 2015
Bright Bold Birthday Card by Martha Lucia Gomez
We LOVE the colors of this fun birthday card created by Creative Team Member Martha Lucia here.
Gomez and shared on her blog recently. She used her Get-it-Straight™ Laser Square to align her elements. Find her instructions
Saturday, April 11, 2015
Life is a Highway Layout by Kristina Beagle
Life is a Highway
Designed by Kristina Beagle
Materials:
KellyCraft™ Get-It-Straight™ Laser Square & Multi-Mat™
DCWV; Rockstar Stack
Recollections; Cool Water Pack
Cricut Explore; Bits & Pieces Cartridge
Sizzix Big Shot; My Favorite Things Pierced Circles Die
Scotch Glue Glider Pro, Tombow Mono Multi Glue, Wink of Sella
Instructions:
I started by choosing my paper, and printing and mating my photos (4x6) onto coordinating colored card stock (4 ¼ x 6 ¼) I used the Get-It-Straight™ Laser Square to mat a piece of pattern paper cut to 8x10, onto colored cardstock cut to 8 ¼ x 10 ¼.
I then added that matted piece to a 12x12 coordinating pattern paper, using the Laser Square to align it.
Now that my base is set, I added my matted photos to the layout, again aligning with the
KellyCraft™ Get-It-Straight™ Laser Square.
I finished my layout by adding assorted embellishments and die cuts
Thursday, April 9, 2015
Living the Good Life by Martha Lucia Gomez
Creative Team member Martha Lucia Gomez shared this fun layout on her blog recently - She used her Get-it-Straight™ Laser Square to align her elements! Find her instructions here.
Tuesday, April 7, 2015
Beautiful Butterfly Card by Martha Lucia Gomez
Creative Team member Martha Lucia Gomez created this beautiful butterfly card recently and shared the instructions here on her blog. Martha used the Get-it-Straight™ Laser Square to align her elements!
Sunday, April 5, 2015
Thursday, April 2, 2015
Normal is Just A Setting on the Dryer Layout by Kristin Kelly
Normal is Just a Setting on the Dryer Layout
By Kristin Kelly
April is always a special month for our family because it is autism awareness month. It's always autism awareness time at our house, but hopefully others get to learn a little more about it during the month of April and then carry that knowledge and understanding with them. We have a house full of love and craziness! We are so blessed to have children that bring so much sunshine into our lives and a son that teaches us something every day, even if that lesson is how to have just a little more patience. Autism hasn't made our lives sad, but incredibly amazing. Of course we have our bad days, but thankfully the good out number them. And that always makes for some great photo ops! So normal at our house? That's just a setting on our dryer! And KellyCraft™ helped me capture it in a layout.
Materials:
KellyCraft™ - Get-It-Straight™ Laser Square and Multi-Mat™
- Jimbo Lojik Stamp Set G
CTMH You Are My Happy and Handwritten Print alphabet stamp sets
CTMH Chalk It Up and American Crafts Show and Tell Patterned papers
CTMH Hollyhock, Sunset, Honey, Pear, Lagoon and Pacifica cardstocks
Oatmeal cardstock
Cricut Artist cartridge
CTMH ink
Scotch ATG and pop dots
Instructions:
1. Cut papers as follows:
Puzzle pattern 2 @ 6"x12"; dovetail one end of each
Star pattern 2 @ 2 1/2"x12"; then cut in 4" & 8" pieces
Hollyhock strips 2 @ 1"x7 1/2" & 2 @ 1"x3 1/2" dovetail ends
Lagoon photo mats 2 @ 4 1/4"x4 1/4", 1 @ 4 1/4"x6 1/4"
Pear photo mat 4 1/4"x6 1/4"
Cardstock strips 1"x approx 5"
White cardstock 3"x1 5/8
2. Sponge ink your edges in black.
3. By placing another craft mat next to your Multi-Mat™, you can set your Get-It-Straight™ Laser line at 9" and it will shine the full 2 pages and adhere your puzzle pattern papers.
4. Adhere your star pattern papers and hollyhock strips flush against the puzzle paper.
5. Place your laser 1" from the top of the puzzle pattern to line up your photo mats and adhere.
6. Use you Get-It-Straight laser Square to stamp the words on your banners. Then crop accordingly and dovetail the ends.
7. Use your Get-It-Straight laser Square at 6" to align your Totally and Intelligent banners, then turn your page to align the remaining banners and adhere with pop dots.
8. Cut multiple puzzle pieces in multiple colors with the Cricut. Adhere along the bottom of the Pear photo mat and in various places on your layout with pop dots.
9. Stamp your Jimbo Lojik phrase on the white cardstock and adhere to a group of puzzle pieces, the pop dot in place.
10. Use your Laser Square to align your photos. Probably better done after step 5, but still works with the word banners already in place!
And your layout is complete!
Subscribe to:
Posts (Atom)