

She Walks in Beauty
Designed by Candice Windham
Lord Byron has been my favorite poet since I discovered him in English 101 at the University of Memphis. Not only was he a great poet, he was handsome as well. In fact, had I been alive in 1814, I would probably have camped out on his doorstep.
When I discovered the photo of this beautiful woman in an antique shop, my first thought was, “She walks in beauty, like the night,” and I knew I had to have her in my instant ancestors collection. I didn’t want to make a scrapbook page, but rather a piece of home décor art. I discovered her frame in a different antique shop and knew it would be perfect with a little crafty magic.
My KellyCraft™ Get-it-Straight™ Laser Square and Multi-Mat™ Docking Station turned this project into an easy-as-pie creation.
Materials:
KellyCraft™ - Get-it-Straight™ Laser Square
- Multi-Mat™
Assorted patterned card stock (Two matching sheets for the mat board cover; two more sheets or assorted paper scraps for the flowers
Photo printed on card stock
Banner printed from .pdf file on patterned paper scrap
Distress Ink, Walnut Stain and Vintage Photo (Tim Holtz for Ranger)
Wide lace strip (Simplicity)
Assorted Flower Dies (Spellbinders™)
Grand Calibur Die Cutting Machine (Spellbinders™)
Craft paint (DecoArt® Americana® Multi-Surface Metallic, Champagne)
Crème Wax (DecoArt® Americana Decor®, Deep Brown)
Masking tape or artist’s tape
Liquid Adhesive (Beacon® Zip Dry)
Double Stick Tape, 3” (Sookwang)
Pop dots
Dew Drops (The Robin’s Nest)
Tools: Sponge, scissors, brush, dusting sheet or soft towel, craft knife, mat cutter if you can cut your own mat
Instructions:
 Note: All die cuts are sponged on the edges with Walnut Stain and Vintage Photo inks.
Tip: Never use your original photos in pieces that will be exposed to light. They could fade completely away. Make a copy and store the original in a dark, cool, dry place.

Cover mat board with patterned paper or card stock. The paper I used had a script, which I was able to match up without trimming. However, I used my KellyCraft Get-it-Straight Laser Square to make sure I had the paper square on the mat board by lining up. here
 the top edge of the mat board and then lining up the script according to the mat board straight edge. I was correct in
thinking the script was a little off. The misalignment would be evident after the piece was finished. That would have driven me nuts. Insert
thinking the script was a little off. The misalignment would be evident after the piece was finished. That would have driven me nuts. Insert
Cut the window opening in the mat board. You can use a craft knife if you don’t want the bevel, or a mat cutter if you do. Position the photo in the opening and attach to the back with masking tape or artist’s tape.
Tip: Before attaching the patterned paper or card stock to the mat board, decide where the cuts will be for the opening. Make sure you have the tape covering all the edges for a smooth appearance after you cut it.
Place the mat board on the KellyCraft Multi Mat Docking Station and

 KellyCraft Get-it-Straight Laser Square. Measure ½” down from the top and turn on the laser light. Apply Beacon Zip Dry adhesive along the line, and then place the lace, being sure to line up the top
edge up with the laser line. It is much easier to apply the adhesive to the paper than to apply adhesive to the lace.
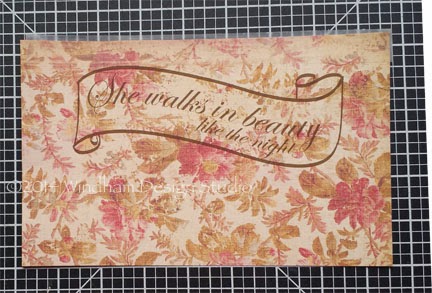
 the mat board, using the KellyCraft Get-it-Straight Laser square toi line up the first and last letters on the top line.
 Cut the flowers, sponge the edges and use Beacon Zip Dry adhesive to apply the flowers to the mat board. Use Zip Dry to add the Dew Drops.
Place the art in the frame, and then cut a piece of chipboard or mat board to place in the back. Add staples if needed.
This would look great on a wall, but I think I will place it on a tabletop easel.
We’ll have a pretty girl to look at, and I’ll be reminded of dreamy Lord Byron every time I see it.
Wishing you and yours a very merry Christmas and the best new year ever!
Candice
Cindi...thisi s gorgeous! So many beautiful details!
ReplyDeleteThis is beautiful, Candice! Very nice!!!
ReplyDeleteOMG, Candice. This is such a beautiful piece of home decor. You really did this beautiful picture justice with your creativity. Love everything about it. Happy New Year, my friend!
ReplyDeleteThis is beautiful! I love it!
ReplyDelete