

"Work Hard, Nap Hard" Baby Layout
by Kristin Kelly
Oh the life of a little one! When work was all about play and the naps were frequent. One might not think of a baby picture layout when looking at the new Duck Commander® stamps from KellyCraft™, but the 'Work Hard Nap Hard' stamp made me think of all the cute pictures we have of James doing his baby 'work' and the naps that followed :).
Materials:
 KellyCraft™ - Get-it-Straight™ Laser Square
- Multi-Mat™
- Duck Commander® wood mount stamp - “Work Hard, Nap Hard”
Cricut™ Artiste cartridge
CTMH - Stardust paper
- Keepsake and You Are My Happy alphabet stamps
- Inks, sander and edge distresser
Scotch ATG
Pop Dots
Paper trimmer, scissors
Instructions:
Gather your supplies and cut your papers as follows:
12x12 white card stock bases
(2) 6x12 pattern 1
(1) 6x8 and (1) 4x12 pattern 2
(2) 1x12 pattern 3
(4) 6 1/2x4 1/2 and (4) 3 1/2x3 1/2 blue mats
(2) 6 1/4x4 1/4 green mats
1) I like some good distressing, so I sanded my blue photo mats. Then I distressed the edges of the green photo mats. All other edges I inked with coordinating colors.

2) Once you adhere the large patterned pieces, use your Get-it-Straight™ Laser Square and Multi-Mat™ to place your strips. Adhere in place.
An awesome thing about the laser is that it will shine all the way across both pages, so you will be sure your strips will match from page one to two!

And on a complete side note, it shines so far that if you have cats, they will be entertained while you scrapbook! Here's my cat Pumpkin trying to get the laser as I work :)
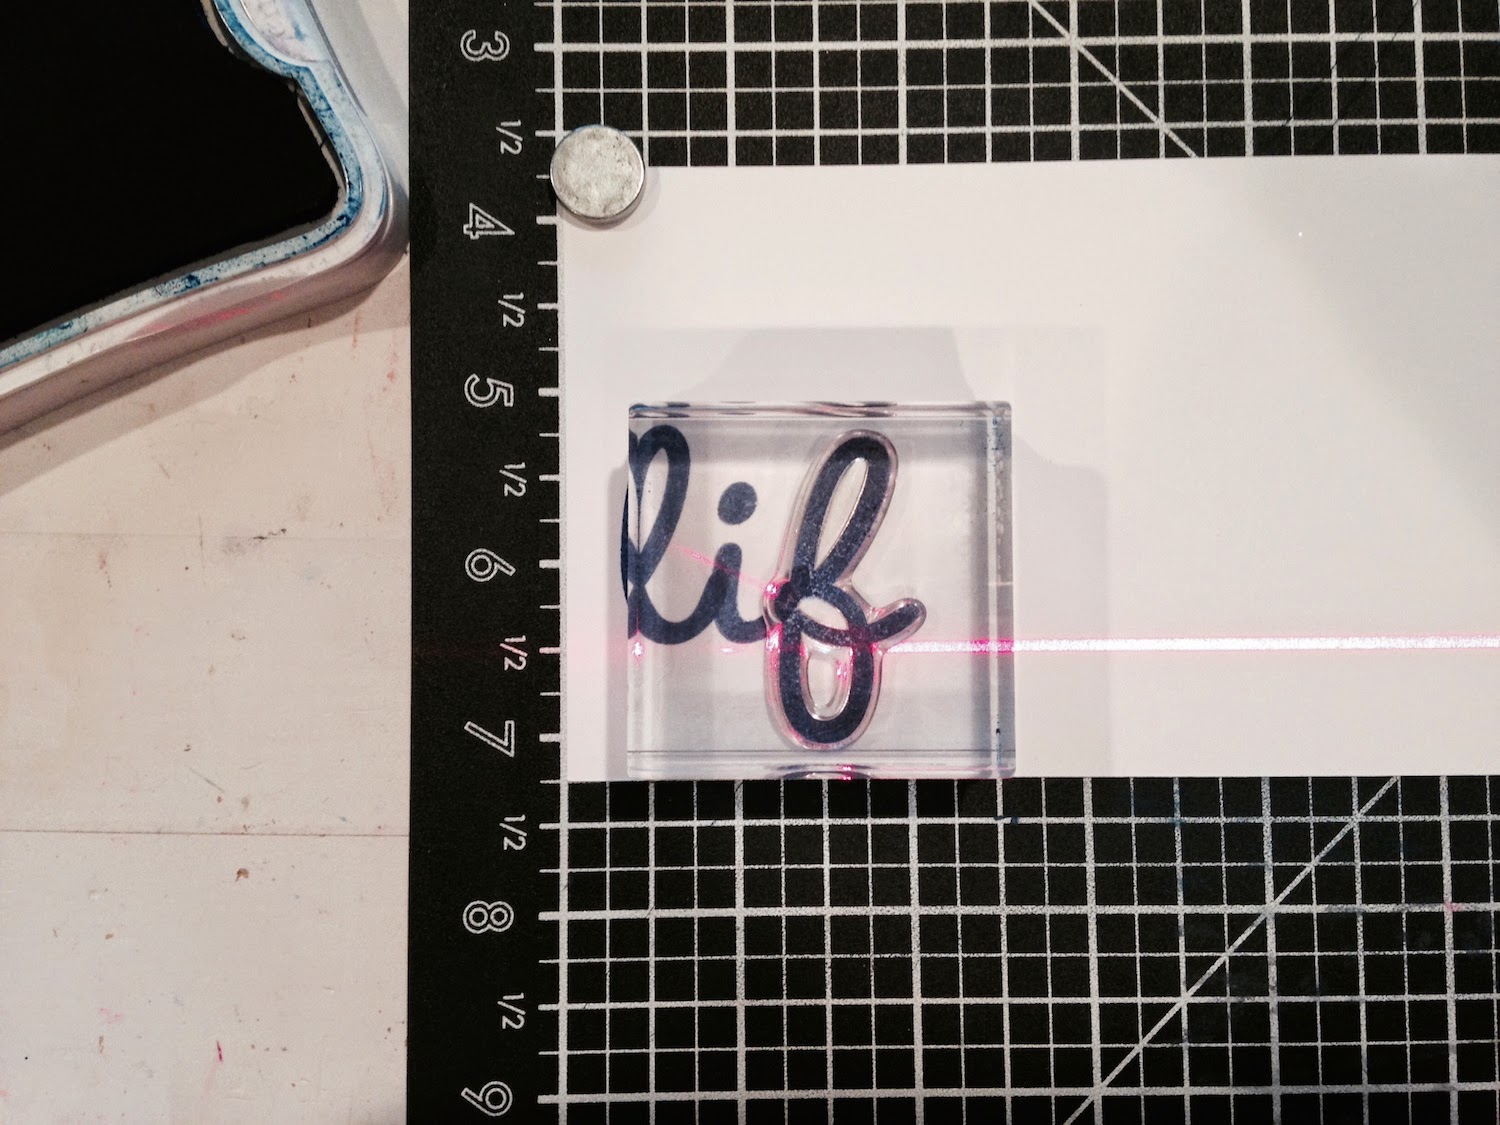
I stamped "life" and "little," then cut them out and set aside. I cut out the gears in different sizes on various patterned papers and card stocks using the Artiste Cricut cartridge.

4) I cut a circle for the 'Work Hard Nap Hard' stamp and centered that circle on my Multi-Mat™ and held it in place with the magnets. Now, even though this stamp is on a wood block, you can still use the Get-it-Straight™ Laser Square to get it straight and centered. Knowing the center of your circle and the height of the stamp, you can place your laser half the height of the stamp down from the center of the circle and line the edge of the stamp with the laser line.

5) Now adhere your photos and mats together and tie your ribbons. Adhere the larger gears, followed by the photos and mats using your Get-it-Straight™ Laser Square to make sure they're straight! Then stamp the rest of the title.

6) Pop dot 'life' and 'little' and using your Get-it-Straight™ Laser Square, adhere them in place. Then, shine a line about 3/4 inch from the bottom of page 2 and using a paper piercer pierce 3 holes for brads.
Turn page 1 on its side and do the same. Put in your brads and then place the remaining gears with Pop dots and you have a finished layout!
Great Layout Kristin!
ReplyDelete