Showing posts with label Get-it-Straight Laser Square. Show all posts

Wednesday, February 11, 2015

Happy Easter! Layout by Kristina Beagle


Happy Easter!
Designed by Kristina Beagle 

Can you believe how fast this year is already going by!! Easter is going to be here before you know it so I thought I’d get a jump on my Easter projects! I got some fun new Doodlebug paper this weekend that I knew would be perfect for this layout Idea so I busted out my Cricut and cut the cutest Easter embellishments, and then grabbed my Kelly Craft Get-It-Straight Laser square and got to work.

Materials:

KellyCraft™ Get-It-Straight™ Laser Square & Multi-Mat™
MISTI Stamp Tool
Sizzix® Big Shot, Framelits “Click Click”
Wendi Vechi Embossing Paste
Doodlebug Chevron 12"x12"
DCWV Pastels 12"x12"
Versa Fine Onyx Black Ink
Cricut Explore; Cricut Classroom: April and May; Cricut: Easter Magic; Cricut: Create a Critter

Instructions:

 1. I started out with a 12x12 base on DCWV pastel purple cardstock and some Chevron stripped Doodlebug Glitter cardstock which I trimmed to 8.5" tall.

2. After lining that up where I wanted it, I used the  the Get-It-Straight™Laser Square & Multi-Mat™ to mark my place, so I could adhere a strip of Washi tape directly above where the paper would lay.

3. After laying the strip of Washi I adhered the Chevron piece of
paper, and masked off both so I could do some embossing paste stenciling.

4. After that dried, I began assembling my page by placing down a little easter egg border, cut from Cricut to serve as a base for my photos.

5. I placed my two small photos, then aligned with the Get-It
Straight™ Laser Square, and adhered with some foam squares.

6. I finished the page off with an off-set 4x6 photo and assorted Easter die cuts.

Friday, January 23, 2015

Come Sit by Me Card by Martha Lucia Gomez

Come Sit By Me! 
Designed by Martha Lucia Gomez

I created this card using the Get-It-Straight™ Laser Square, Multi-Mat™ and Jimbo Lojik™ Stamp Set J. With these tools it is very easy to align and assemble my projects.

Materials:

KellyCraft™ -  Get-it-Straight™ Laser Square
                      - Multi-Mat™
                      - Jimbo Lojik™ Stamp Set J
Stampin Up - Card Stock Very Vanilla and Raspberry Ripple, Modern Mosaic Embossing Folder
Sizzix BigShot
Memento Black Tuxedo Ink Quick Quotes
PowerPuff Chalk Ink Razzberry
Ranger-  Distress Ink Antique Linen, Distress Ink Victorian Velvet, Blending Tool
Snail Adhesive
Dimensionals
Glue Dots
Bella Blvd. Feathers


Instructions:

1. Cut all the pieces to build the card. The size of the card is a regular size 5-1/2"x4-1/4". The second layer is 5-1/4" x4" the third is 5"x1-1/2."

2.  Create the embossing for the second layer using the Modern Mosaic Embossing Folder and your Big Shot.


3. Paste this layer directly over your card base aligning this with the Get-It-Straight™ Laser Square.


4. Ink you stamp with Memento Black Ink and use Get-it-Straight™ Laser Square to align and stamp your message.


5.  Put some dimensionals behind  your message and use Get-it-Straight™ Laser Square to align and paste this on the bottom part.

6. Now using a chipboard piece to finalize the decoration of the card . First ink the entire piece with a neutral color of Distress Ink like Antique Linen, then stamp a main image with another color and finally ink the borders with PowderPuff Chalk Ink Razzberry from Quick Quotes.


7. Take a green Feather from Bella Blvd and use a glue dot to paste it behind the chair. Attach the
chair to the card and give it your personal touch.

I hope you liked the project and come back soon for more inspiration!

Tuesday, January 13, 2015

Happy Happy Happy Birthday Layout by Kristina Beagle

Happy, Happy, Happy Birthday Layout 
by Kristina Beagle 

Today we have a quick and simple scrapbook page showing the fun versatility of the Duck Commander® stamps!


Materials:

KellyCraft™ - Get-it-Straight™ Laser Square
                      - Multi-Mat™
                      - Duck Commander® Wood - Happy Happy Happy
DCWV; Silky Smooth cardstock
Versa Magic ink pad
A La Mode; Pink embossing powder
Cricut Explore
Miss Kate Cuttables; Birthday Cupcake cuts 

Instructions:
1. I started with my base 12x12 sheet of cardstock and found matching pieces to coordinate. As always, I began by cutting mats for my 4x6 photos onto some 4 ¼ x 6 ¼ inch mats.

2. Next I cut  a 12x3 inch strip of neutral cardstock to tone down the background and later provide a space to mount my embellishments and title, and aligned and adhered with my Get-it-Straight™ Laser Square

3. I then cut a 9x7 base for my photos, lined up with my Get-it-Straight™ Laser Square and adhered to the page.

4. Next I aligned and adhered my photo mats and photos. I typically adhere my photos onto their mats first, then the page, but now have found it easier to do the opposite and line them up with the Get-it-Straight™ Laser Square after the mats are on the page. 

5. To finish the page off, I stamped & embossed my sentiment onto a 1 inch circle punch from the same brown cardstock used earlier, and added my title & embellishments previously die-cut.

Wednesday, January 7, 2015

DUCKMEN Layout by Kristin Kelly

                                     
DUCKMEN!  
Designed By Kristin Kelly

Sitting in the water in the cold doesn't sound like a good time to me, but it's just what these hunters needed to find some ducks and have a great hunting trip. And KellyCraft™ helped to record those memories.

Materials:

KellyCraft™ - Get-It-Straight™ Laser Square and Multi-Mat™ 
                    - Duck Commander clear stamp sets 1 & 2
CTMH Pure Adventure stamp set
Paper Loft Huckleberry Pond and Back Country papers
CTMH Timberline paper and cardstocks
Cricut Art Philosophy cartridge
CTMH and ColorBox inks
Scotch ATG
Glue Dots 
Pop Dots


Instructions:

1. Tear a large circle approximately 11 1/2". Cut a strip 2" x 11 1/2" and another 2" x 10" out of your patterned papers. Then cut 2 photo mats, one at 8 1/4" x 8 1/4" and the other at 8 1/2" x 8 1/2". Then ink all of the edges. I used CTMH Desert Sand re-inker and a paintbrush because I love the effect it gives.

2. Next, using your Get-It-Straight Laser Square, attach the large circle.  Then turn your layout and attach your strips.  
And attach your mats and photo.


3. Now, using a sanding block, sand an area on your photo about 2 1/2" x 1/2". Then use your Get-It-Straight™ Laser Square to stamp 'Duckmen' on the photo using ColorBox Bark ink.

Then adhere to your layout.

4. Next, on the Cricut, cut 2 ovals 1 1/2" and 1 3/4", 2 tags 2 1/2" and 2 3/4" and multiple
rectangles in red and green at 2" and in bronze at 2 1/2". Ink the edges of your ovals and tags using the same technique as above. Stamp the Duck Commander Logo on the smaller oval, and the Jase Robertson quote on the smaller tag. The Laser Square keeps it all straight!

Make the shotgun shells by cutting 3/4" off the bronze rectangles and applying to one end of the green and red rectangles and trimming the sides. Attach to layout, some flat and some with Pop Dots.

Attach ovals and place on layout using Pop Dots. Cut a small circle and place an eyelet in the middle to look like a shotgun shell. Attach to your tags and then to the layout using Pop Dots. 

5. Finally, stamp a few ducks in the top corner.

Now, not only was their shooting straight, but the guys have a Get-It-Straight™ layout to remember their trip courtesy of KellyCraft™.

Friday, January 2, 2015

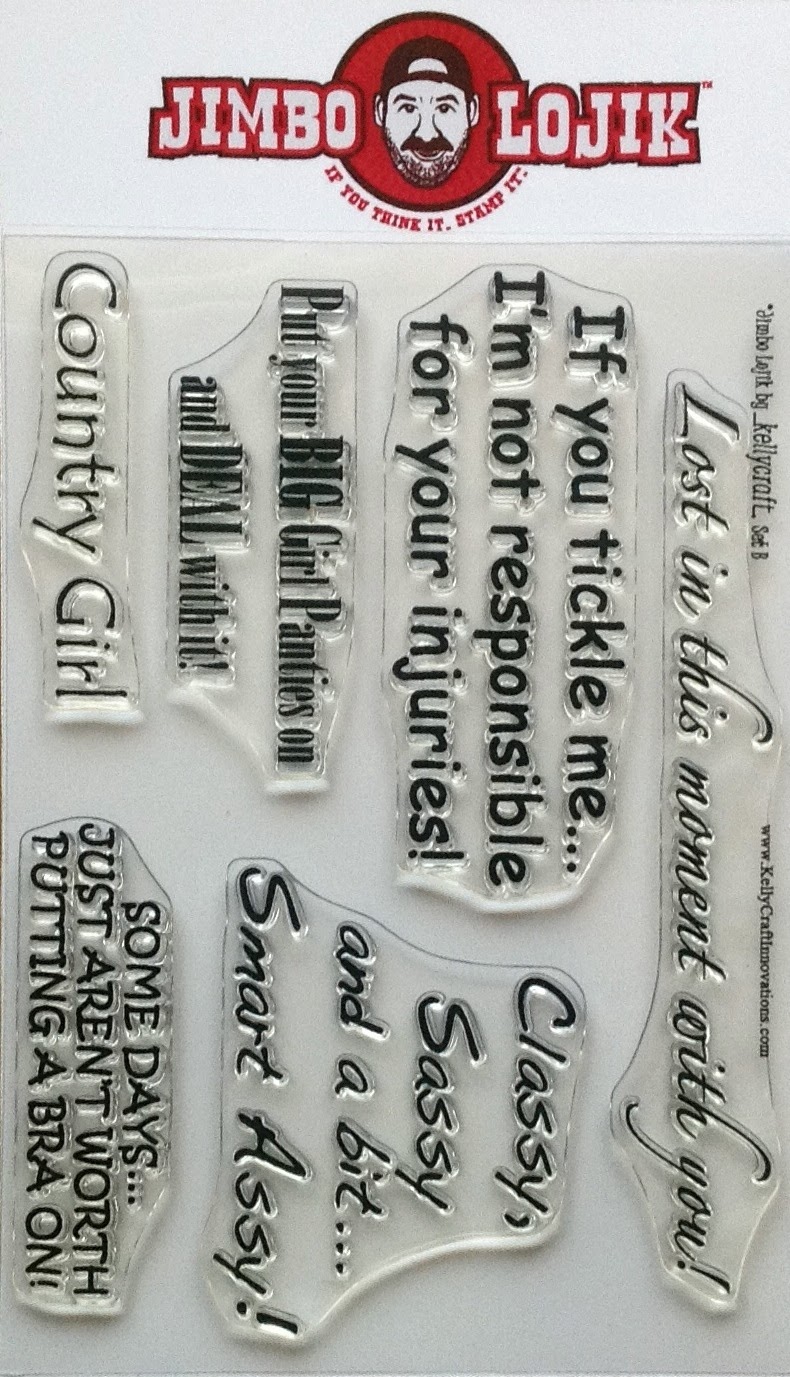
"Some Day's Aren't Worth Putting a Bra On!" Card by Cindi Bisson


"Some Day's Aren't Worth Putting a Bra On!"
Designed By Cindi Bisson

 Materials: 

KellyCraft™ - Get-it-Straight™ Laser Square
                    - Multi-Mat™
                    - Jimbo Lojik™ Set B 
Brick red, tan parchment card stock
Graphic 45® Domestic Goddess paper collection 
Clearsnap® ColorBox® Archival Dye ink pad - Suede 
Grey velvet 1/4 ribbon 
Grey vellum flower photo corners 
Aleene's® Quick Dry Tacky Glue® 
Westcott® Titanium Bonded Scissors, TrimAir Trimmer 


Instructions: 

1) Cut brick red card stock to 9" x 5 3/4".   Fold in half to form card. 

2) Ink verse with Suede ink.  Use Get-it-Straight™ Laser Square to align and stamp verse on tan parchment card stock. Ink edges of verse with Suede ink pad. Cut brick card stock mat for verse.  Mount.   Add flower photo corner to upper left an lower right corners. 

3) Cut patterned paper to 5 1/2" x 4".

4) Use Get-it-Straight™ Laser Square to align and mount centered on patterned paper.  Add grey vellum flower accents around verse.

5) Get-it-Straight™ Laser Square to align patterned paper with verse, centered on card front and mount.        
6) Mount grey velvet ribbon around patterned paper, using Get-it-Straight™ Laser Square to ensure ribbon is straight. 

Thursday, December 4, 2014

"If You Tickle Me" Card by Cindi Bisson


"If You Tickle Me" Card 
Designed By Cindi Bisson 

Materials: 

KellyCraft™ - Get-it-Straight™ Laser Square 
            - Multi-Mat™
            - Jimbo Lojik stamps - Set 
Offray® yellow & white polka dot ribbon - 1” x 5 1/2”
Aleene’s® Quick Dry Tacky Glue® 
Sizzix® Big Shot® and Texturz Starter Kit
We R Memory Keepers™ Crop-A-Dile tool
Westcott® Titanium Bonded Scissors, TrimAir paper trimmer 
Turqouise, white, brick red card stock, 4 yellow eyelets 


Instructions: 

1) Cut turquoise card stock to 8 1/2” x 5 1/2”.  Fold in half to make card.   

2) Following manufacturer instructions, texture card with Sizzix® Big Shot® and texture plate. 


3) Ink verse stamp with turquoise Clearsnap® ColorBox® ink.  Using Get-it-Straight™ Laser Square to ensure straight stamping, stamp onto white card stock.  Trim around verse as needed.           


4) Ink edges of verse.   
Cut brick red card stock mat for verse.  Use
Get-it-Straight™ Laser Square to 
align verse onto mat and mount centered. 


5) Add large yellow eyelet to corners of verse.  

6) Cut patterned paper to 4 3/4" x 3 3/4".  
      
7) Use Get-it-Straight™ Laser Square to align and mount approximately 

8) Use Get-it-Straight™ Laser Square to align and mount ribbon centered on card horizontally.


9) With card in vertical position, use Get-it-Straight™ Laser Square to align and mount verse approximately 1” from bottom of card.  

Wednesday, November 26, 2014

Country Girl Wedding Card by Monica Edwards

Saturday, February 15, 2014

'B' Is For Beyer-Get it-Straight with KellyCraft


When searching Pinterest for Christmas gift ideas, I came across an initial door hanging with a chevron pattern on it.  I immediately thought of my sister, Tracy 'B'eyer, and the idea that she could hang it in her classroom. So coming up with the idea, not so difficult. Bringing it to life, a little more so! But my KellyCraft Get-It-Straight Laser Square to the rescue!

Supply list:
Wooden Letter
Paint
Burlap Ribbon
Flower
Cricut Vinyl
Cricut Close To My Heard Artbooking Cartridge
KellyCraft Get-It-Straight Laser Square
Hot Glue Gun
Small Screws
Drill
Sandpaper

First step is to prepare the letter by sanding. Then apply your base color of paint. I chose this beautiful metallic gold because I felt it went with the bright green that my sister likes quite well. Apply as many coats as necessary to get your desired look and sand as needed.  Then you need to cut your stencil out of vinyl using the Cricut Artbooking cartridge. I cut multiple zig-zags so I would have enough for the entire letter.  And now for the part I never would have been able to do without my KellyCraft Laser Square! Getting the stencils straight on the letter!


Place your letter in your Get-It-Straight Laser Square. Slide your laser to your desired measurements to get the spacing you want for your stencils and stick them down. Continue this the entire letter. The Laser Square made it so easy to line up the points exactly straight all the way across the letter.


Once your stencils are all in place, it's time to paint the chevrons! This green is one of my sister's favorite colors right now, plus it really stands out against the gold metallic. Again, apply as many coats as needed for your desired look. Once the paint is dry, remove your stencils. Then apply your embellishments as you would like! I chose to make a bow out of a great burlap ribbon that matched the green and place a gold flower in the center. I attached both with hot glue. Now, using small wood screws, Jimbo (I'm not so good with the drill, so I had to enlist the expert for that!) attached another piece of the burlap ribbon to the back to create a hanger. Make it as long or as short as you like and even tie a bow on it. And you are done! A little time to create, mostly for letting paint dry! But not nearly as time consuming as it could have been if not for the KellyCraft Get-It-Straight Laser Square. Those chevrons would have been one crooked mess if not for the Laser!! My sister loved her gift, and I like it so much I see a 'K' being done in the near future!

Friday, February 14, 2014

Happy Valentine's Day

Everyone at KellyCraft Innovations
would like to wish everyone a very
Happy Valentine's Day


and remember our....


VALENTINES DAY SPECIAL!  
Laser Square / Multi-Mat Bundle $89.95 
thru February 15th!  

Use Coupon Code VAL2014  

FREE SHIPPING
 thru February 28th 
for orders over $50!  

Multi-Mat, Jimbo Lojik and EZ-De's Stamps now available!  

Laser Square "White Box Special" price of $49.95 while supplies last!

Thursday, January 30, 2014

A Place Called Home Card


Supplies

KellyCraft Get-it-Straight Laser Square

KellyCraft Multi Mat

Spellbinders Grand Caliber Machine

Spellbinders Nestabilities Die- Detailed Scallops

Heartfelt Creations Sun Kissed Fleur Swirls Stamp Set

Heartfelt Creations Burnished Key Hole Stamp Set

Clearsnap ColorBox Archival Inkpad- Very Berry

Prismacolor Color Pencils

Gamsol Mineral Spirits

Blending Stump

Beacon Adhesives Zip Dry Paper Glue

Foam Tape

Scissors


Instructions


IMG_5421.JPG
Gather all of your supplies. Cut your cardstock as follows. White
cardstock 4 1/2" x 6 1/2", Pattern paper 5" x 7", and Pink cardstock
5 1/2" x 7 1/2".


IMG_5426.JPG
Run the white cardstock through the Grand Calibur machine
using the Nestabilities Detailed Scallops die following the
manufacturer's directions.

IMG_5431.JPG
Stamp the flowers twice. Once on the die cut white cardstock
and once on a scrap piece of white cardstock with the "very berry"
inkpad. Stamp the saying on the scrap paper.

IMG_5433.JPG
Color the images with color pencils and blend the colors with
the blending stump and Gamsol solution.

IMG_5437.JPG
Cut the flowers out from the scrap piece of cardstock.


Cut out wording and layer it onto a scrap piece of cardstock.

Add foam tape to the back of the flowers.

Use the Get-it-Straight Laser Square to layer all the papers together.
Adhere layers with Zip Dry Paper Glue.


Apply foam tape to wording and adhere to
the card front.